Yoga for Respiratory Health
Published March 30, 2020 by Sheila Anne MurrayWhat with the coronavirus, there’s a lot of talk these days about respiratory health, and perhaps you (like me) are thinking more than ever about your vital organs and how to promote their functionality. Of course, the basics like nourishment 😛, exercise, sleep, and stress reduction are essential to keeping your body healthy and happy. To take things one step further, you can increase self/body awareness and integrate specific yoga poses to nurture your respiratory system.
How yoga can nourish your respiratory system:
- Increase breath awareness
- Strengthen the muscles in the chest and back that support respiratory system + primes respiratory muscles, through the practice of breathwork
- Promotes spinal flexibility and posture
- Decreases stress
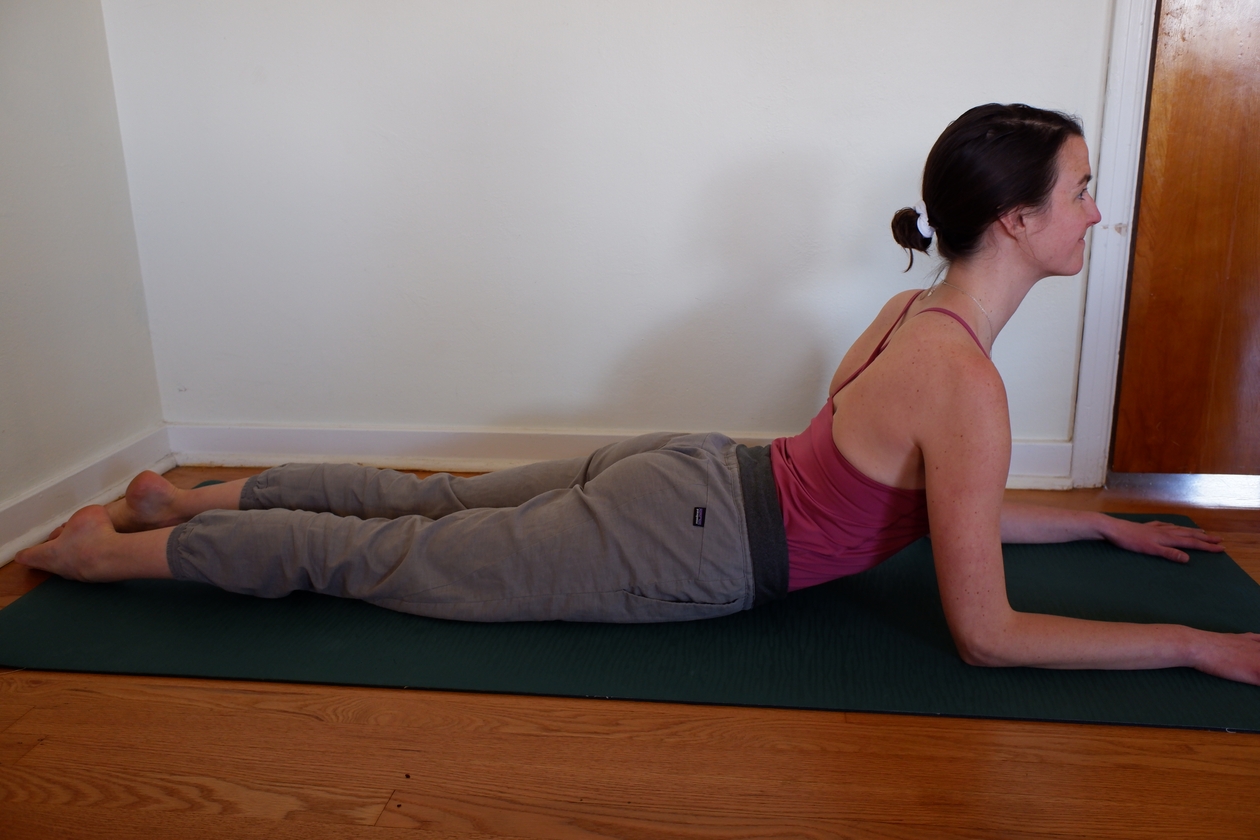
Sphinx Pose
Benefits:
- Stretches the chest, lungs, shoulders, and abdomen
- Massages & stimulates the abdominal organs
- Strengthens the spine
- Promotes stress relief
Start lying face down on a mat or blanket. Legs can extend straight behind you, hips distance apart.
Press the tops of your feet down into the ground, lengthen your tailbone toward your heels, rotate your outer thighs toward the floor. This will help lengthen and protect your back and sacrum.
Bring your forearms under you, parallel to one another, elbows under shoulders. Head can still be resting on the ground, eyes looking down.
On an inhale, press down through your forearms and lift your chest off the ground. Equally press your pubic bone into the floor and strongly engage your legs, continuing to roll your outer thighs slightly toward the floor to help lengthen your low back.
Gently draw your bellybutton up toward your spine, creating more length and comfort through your low back.
Hold for 10 breaths; keep eyes and face soft.
Cat & Cow Pose
I’m a big fan of rinsing through cat & cow during class. Whether it’s during warm up or following a tough ab series, flowing through these complementary poses is a treat.
Benefits:
-
Warms body and increases spinal flexibility
-
Stretches the torso and neck
-
Massages and stimulates the belly organs
-
Opens the chest
-
Awakens the kidneys and adrenal glands
-
Is a fantastic tool to start linking breath and movement
Start in a neutral tabletop position — hands under shoulders, knees under hips or a little behind hips depending on how it feels for you.
Gaze down so that the crown of your head shines forward and you feel some length in your spine.
Cow
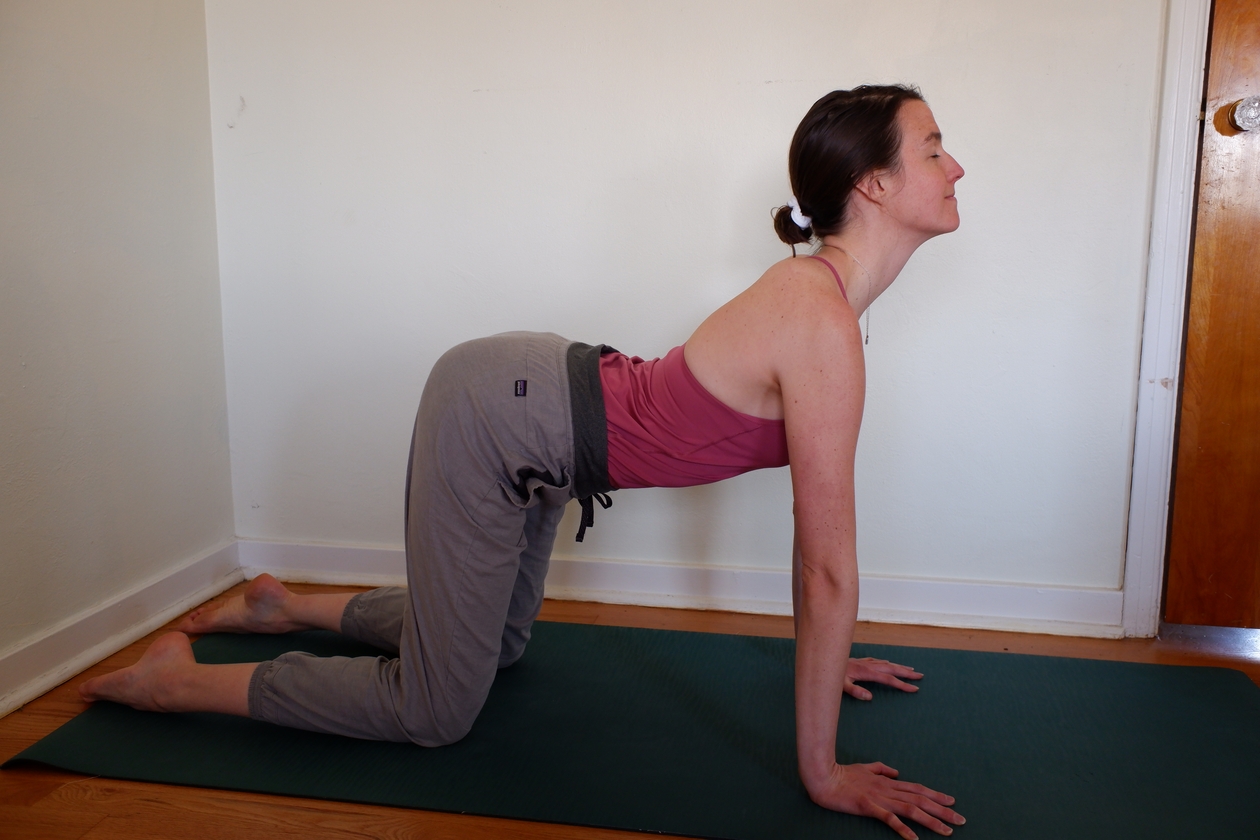
Inhale and allow your belly to be heavy as it moves toward the mat, and lift your chest in opposition toward the ceiling.
Cat
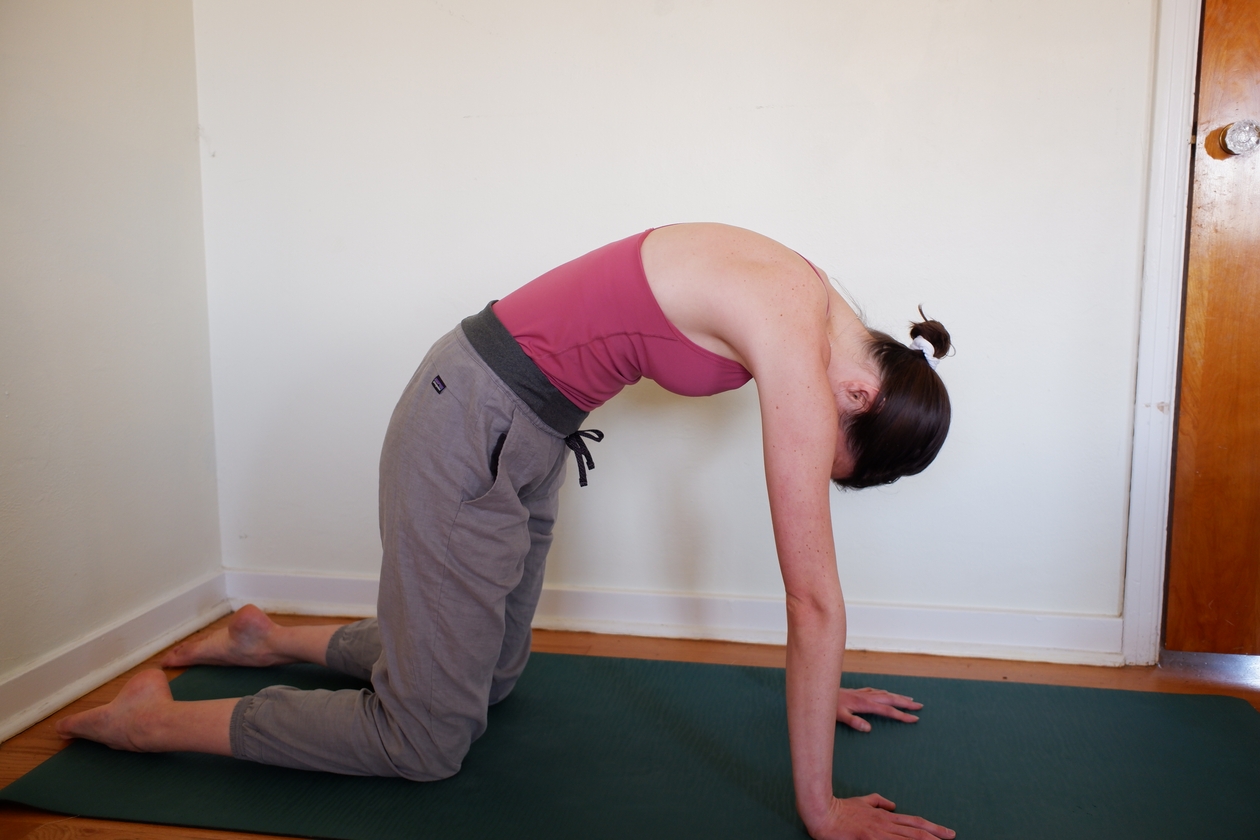
On the exhale, tuck the chin, round the belly up, draw the tailbone down toward the mat.
Repeat 5 - 10 times, continuing to move with the inhales and exhales.
Notes:
For those that are pregnant women or have back injuries — Try to flow through the cat-cow gently and see how your body feels. If there is a defining strain, think about lifting and lowering the tailbone instead. Start in a neutral table top, then move through the hips and think about lifting the tail bone up on the inhale and drawing it down on the exhale.
Side Bends
Side bends are a great way to strengthen and move your diaphragm while increasing the flexibility of your ribcage.
Benefits:
- Lengthen the abdominal muscles, hips, and thigh muscles.
- Improves flexibility in the spine.
- Stretches the intercostal muscles, which tend to shorten and tighten in daily life.
- Creates length and space for the digestive organs to do good work!
There are a whole slew of yoga poses that involve side bending, and I’m going to offer three options that build in intensity. Try all three or see what your body is asking for!
Seated Side Bend
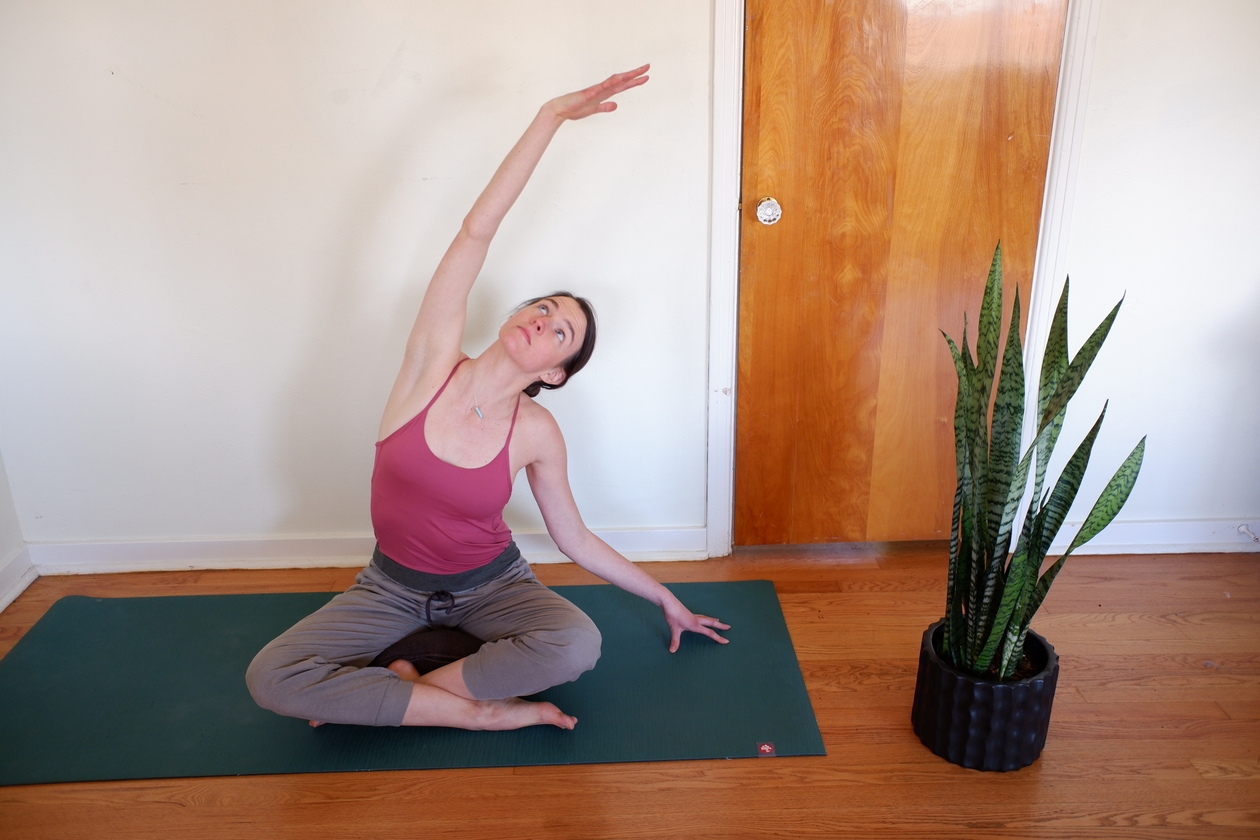
Start seated on a chair or on the floor, with a block or pillow under you if your hips are a little tight. I like sitting atop a block/pillow because it already creates a feeling of length in my spine and encourages me to straighten up in my posture.
Tent the fingertips of your left hand on the floor beside your left hip or place them on your hip if you’re seated. Inhale right arm to the sky. Exhale right arm so it arcs over your body toward the left. Inhale to grow long, exhale to sink deeper. Eyes can follow the right fingertips to the sky, or gaze down at your left hand.
While the right side grows long, bring awareness to the left rib cage and lengthen there too. Having the fingertips tented or the hand on the hip/rib cage helps with this.
Inhale to rise the right arm up. Exhale back to neutral seated.
Move on to the other side!
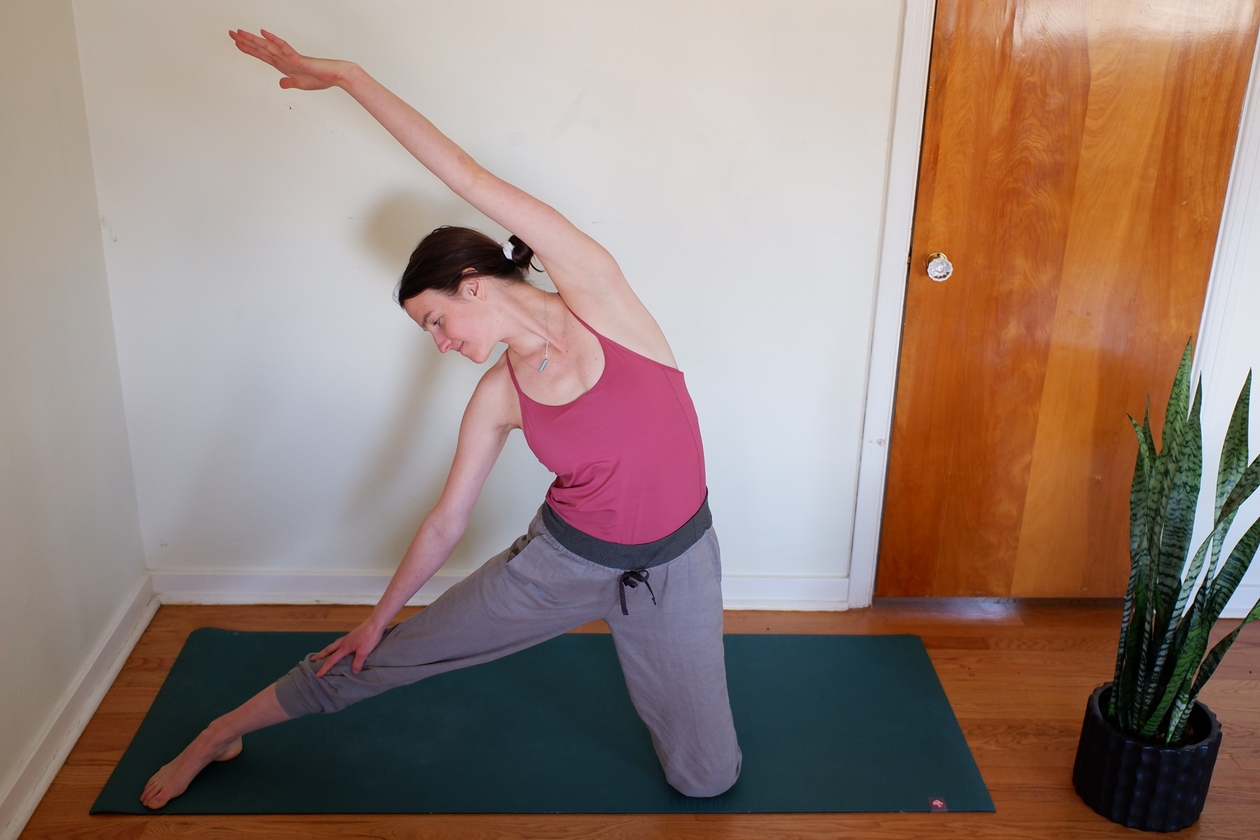
Gate Pose Flow
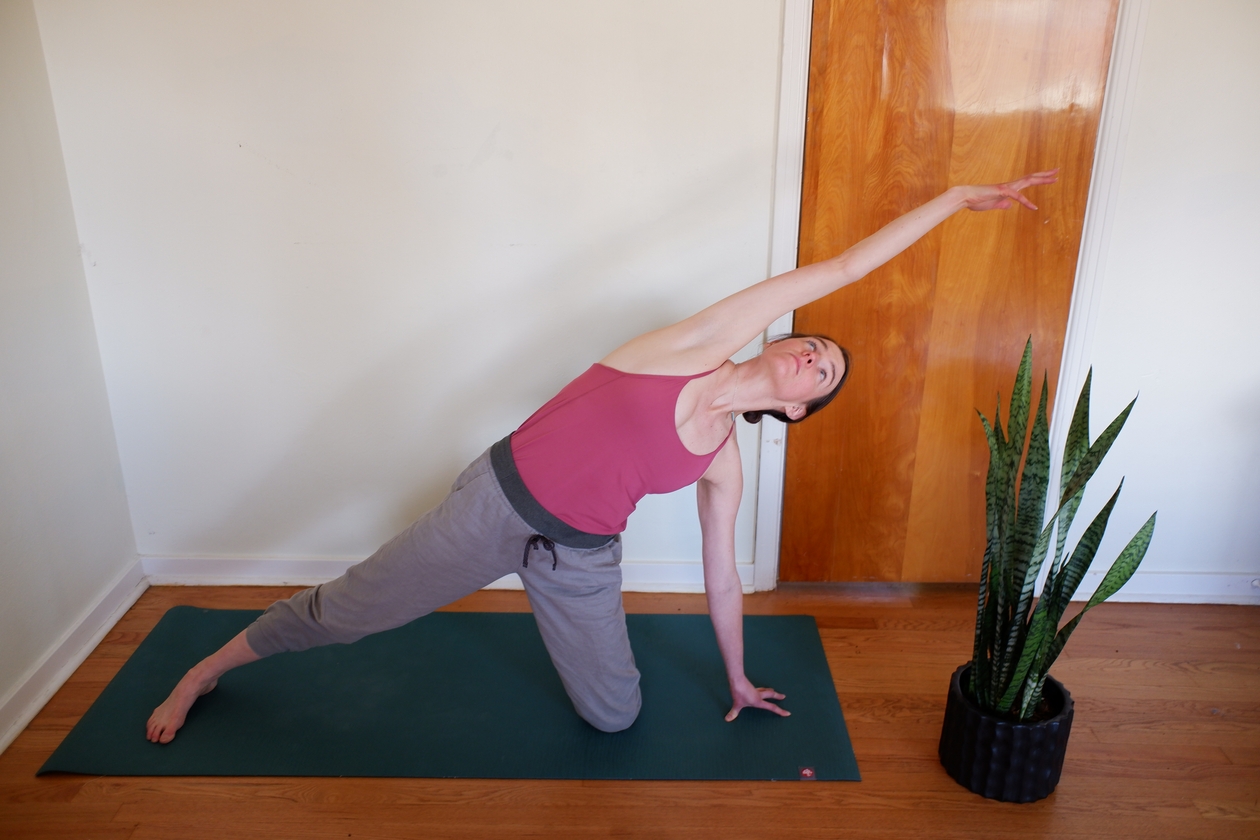
Begin kneeling on the floor. If you have knee pain, place a folded blanket beneath your knees.
Place your left hand outside your left knee, using a block or pillow (or whatever you got!) under your hand if it’s too big a reach.
Keeping your knee directly below your left hip, extend your right leg out to the right, in line with your right hip. Press the outside of the right foot into the ground. You may feel an awakening in the right hip here.
Inhale right arm up, arching it over your right ear, toward the left side. Feel the long line from the outside of the right foot, up through the right finger tips.
Extend the tailbone down toward the extended right leg, tuck the pelvis, and open your rib cage toward the sky.
Inhale to grow long, exhale to side bend a little bit deeper. Eyes can gaze down toward the left knee or up toward the right finger tips.
Release the arm and bring your torso back to center, with the left knee under left hip and right leg still extended.
Inhale arms to shoulder height, palms facing down. It may feel like a “t” position through your upper body. Exhale torso to right, resting right hand wherever it lands — thigh, shin, or ankle.
Draw a line up toward the sky with the left palm, allowing it to arch over to the right, bicep can come to the ear. Again, eyes can gaze down towards the extended right leg or up to the left fingertips.
Other right foot placement variations: you may open your right toes to the right, or even lift them off the mat, leaving your heel on the ground.
To release, inhale and engage your core to come back to center, both arms returning to that original “t” position.
Right leg can return to mirror the left.
Complete on the other side.
Reverse Warrior
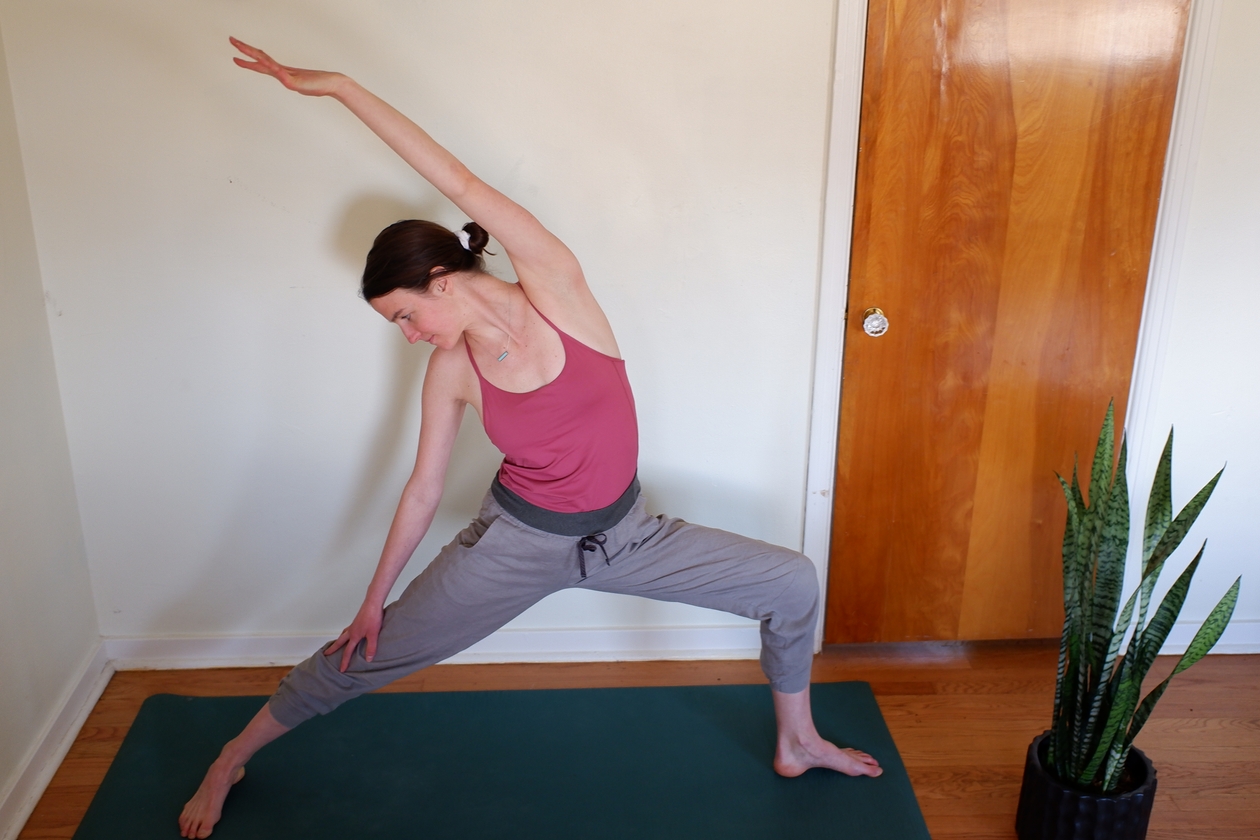
Starting in mountain pose (standing with feet grounding into the mat/floor) step right foot back to a lunge.
Open up the hips to the right and allow the outside of the right foot to come to the ground. Arrange feet so that you could draw a line from the left heel through the arch of the right foot. You may want to adjust the length of your stance for comfort.
Inhale arms to shoulder height, palms facing down, gazing over the front fingertips. Exhale here. You are in Warrior II.
Flip the front palm and inhale it up over your head, allowing a stretch for your left side body. Right arm can rest wherever it comfortably lands.
Just as with our other poses, resist crunching into your side body. Though it might be tempting here to crunch your right side as you focus on lengthening the left, instead engage your core and ensure you can breathe deeply into your diaphragm.
Eyes can gaze toward your left arm, or down to the floor.
Remain here for 5 - 10 breaths.
On the inhale, lead with your left arm back to Warrior II, come back to the lunge, then back to mountain pose.
Complete on the other side.
Namaste
Throughout these poses, remember to bring awareness to your breath and to honor the signals your body is sending you. Be well & happy flowing! 💚
Pssst. Did you know that I have 1:1 programs for women that are looking to be well & pave a path to success? I integrate mindfulness, movement, and individual assessments to help you tap into your power and make an action plan toward the life you desire! The first call is free 👉🏻 Schedule my call now!